• Steel Soldiers now has a few new forums, read more about it at: New Munitions Forums!

  • Microsoft MSN, Live, Hotmail, Outlook email users may not be receiving emails. We are working to resolve this issue. Please add support@steelsoldiers.com to your trusted contacts.


What have you done to your 5 ton this week?

jonesal

Mission Specialist
Steel Soldiers Supporter
412
62
28
Location
Brookings, SD
Well after a bit of messing around, today was the day to install the winch on the m818. That's enough work for one guy today. Lol next is install the pto and linkage tomorrow. The goal is to have everthing installed minus the cable since I don't have one yet and painted before the Washington arms collector show on Aug 1st since I will have the tractor trailer and mep04 on display there that weekend.View attachment 572087View attachment 572088View attachment 572089
Uh, whats that parked in the right of the pictures...?
 

battlecat

New member
26
0
0
Location
Greenville/NH
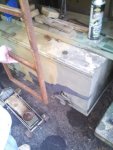
Just in case someone needs a mock up for their battery box.

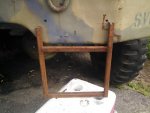
I used all junk bed frame L channel steel $free... Just a lot of welding and patience. Best part was I could start the truck and hear it rumble... Now the master cylinder rebuild and then tires.. Almost forgot I welded the mirror bracket on the passenger side that was wire tied together. I also cut the ladder off to make access side box access. I know the cuts not the same, someone tried cutting it off before me...


View attachment 572083View attachment 572085View attachment 572084

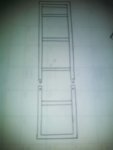
I'm planning to weld in some smaller box metal into the ladder metal so the step can be removable. This way I can weld some box metal to the bumper and use the same ladder section for the side and front. I'm sure I can do the same for the tailgate and then I have a ladder section I keep in the tool box that fits all around the truck.

New Image ladder 1.jpgNew Image ladder 2.jpgLadder 3.jpg
 

battlecat

New member
26
0
0
Location
Greenville/NH
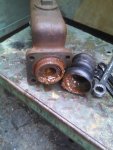
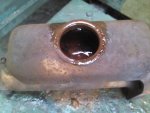
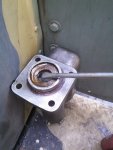
Anyone know the trick to getting the master cylinder to give up its guts? I'm doing a MS rebuild so I pulled it out cleaned it off pulled the snap ring tension piece in the plunger section but it doesn't want to open up any further? The unit is pretty rusty so I'm soaking in in penetrating lube but it wont budge. I have tried using a flat head screw driver wedged in under the round metal washer but it doesn't seem to budge (not even a little) trying from all around.

Master cylinder.jpgMaster cylinder 2.jpgMaster cylinder  6.jpg

I got a good deal on the truck and the mud was free!! Anyone who has had this issue please lend some advise....


Thanks
 

rhurey

Member
Steel Soldiers Supporter
737
13
18
Location
Bothell, WA
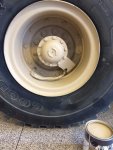
Installed a couple of USB charging ports next to the driver's seat. Painted rims and swapped steer wheels.

WP_20150724_002.jpgWP_20150724_003.jpg

Also put the lug nut torque indicators on. Having bought some, I know realize how easy it would have been to make some on the laser cutter at work. Oops.

Swapped out and dissected the coolant filter.
Been on the truck for 3 months.
WP_20150726_004.jpgWP_20150726_008.jpg

Coolant system had been changed / flush about 3 months before the filter was installed. Thought it started to look clearer afterwards, but this seems to confirm it.

Started raining, so I didn't get the top of the cab painted like I wanted to. Maybe one night this week.
 

tbar123

Member
691
24
18
Location
enon,oh
Swapped out and dissected the coolant filter.
Been on the truck for 3 months.
View attachment 572404View attachment 572405

Coolant system had been changed / flush about 3 months before the filter was installed. Thought it started to look clearer afterwards, but this seems to confirm it.
Looks exactly how mine did. I just hope since I completely dissected the cooling system it won't look like that in October when I plan on replacing the coolant again!
 

rhurey

Member
Steel Soldiers Supporter
737
13
18
Location
Bothell, WA
That's a NICE masking job. Did you get 12V USB's? Hook them to the 12V battery, or do something else cool like 24V ones? I am thinking about this too! Got a part # or a pict?
Thanks. Saved the covers so when I paint the next set to go on...

24V to USB. Put a fuse block in a while ago, so one more entry.

http://www.amazon.com/gp/product/B00KIIO7GC?psc=1&redirect=true&ref_=oh_aui_detailpage_o07_s01

Cheap, tested it with an old cell phone and it charged it... I'll try it tomorrow with my phone. Contract's up, so it's just a pain if it fries it.
 

battlecat

New member
26
0
0
Location
Greenville/NH
If its like the old car master cylinders you put a rod in there and push the piston all the way to bottom and it releases and the guts fall out.

Thanks... I just tried that and no go. I got frustrated yesterday and tried to cut it out and even then it's in there like it welded it's self... New Master Cylinder and air pack ordered
 

MyothersanM1

19K M1 Armor Crewman
Steel Soldiers Supporter
1,954
401
68
Location
Culver City, CA
-Front axles greased and put back in,

-spindles and new (to me) M939/M939A1-series wedge brake spiders bolted on,

-new front brake shoes and return springs installed,

-inner hub seals and freshly repacked bearings installed,

-M939/M939A1-series front hubs/drums and axle caps installed.
 

therooster2001

Active member
824
43
28
Location
Colorado
Yes, I did brush this one, and the paint self leveling is pretty awesome. I will be spraying the rest, but couldn't help myself in doing a couple of other spots.. Once you start though, you can't stop... It looks too good.
 
Top
AdBlock Detected

We get it, advertisements are annoying!

Sure, ad-blocking software does a great job at blocking ads, but it also blocks useful features of our website like our supporting vendors. Their ads help keep Steel Soldiers going. Please consider disabling your ad blockers for the site. Thanks!

I've Disabled AdBlock
No Thanks