• Steel Soldiers now has a few new forums, read more about it at: New Munitions Forums!

  • Microsoft MSN, Live, Hotmail, Outlook email users may not be receiving emails. We are working to resolve this issue. Please add support@steelsoldiers.com to your trusted contacts.


What have you done to your HMMWV today/lately

Another Ahab

Well-known member
17,825
4,157
113
Location
Alexandria, VA
Our neighbor is running to retain her seat in the legislature. She and her husband came up with the signs, shirts and jetpacks, I only had to supply the truck. I jumped at the chance for the kids to be in the parade, and I secretly hoped to make a favorable impression of our hobby on her. (I'm not sure she is 100% sold, but I think her husband is shopping for his own steelsoldier.)
Your strategic initiative is brilliant. [thumbzup]
 

DatGuyC

Member
537
20
18
Location
Essex, Maryland
Finished my 2 inch body lift, took all Friday and Saturday. Also swapped my blown S3 box for an Nartron EESS and everything seems to be ok again, whoever designed that system should be shot.
20160326_184608.jpg
20160326_184617.jpg
20160326_184640.jpg
 

kestrelnh

Member
76
0
6
Location
Etna, NH
I finally got the pitman arm off the steering box on the second day of trying. It took penetrating oil, I broke two pullers, and finally careful application of heat, but it came off, kicking and screaming the whole time. I hope I don't have to put in a new steering box because of the heat, but we'll see! There is definitely anti-seize going on the splines when I put it back together.

I also fixed my front right blinker that wasn't turning on. The problem traced to corroded contacts inside the turn signal stalk. It was pretty easy to pull apart and dress the contacts (they look just like points contacts), and once back together everything works nicely.
 

Retiredwarhorses

Well-known member
Steel Soldiers Supporter
4,261
3,874
113
Location
Brentwood, Calif
Installed new front winch springs on my M1097A2, also swapped over to 4 new BFG's on 24 bolt rims, changed fluids in geared hubs and diffs, replaced PS pump, replaced stuck open thermostat, added Milemarker winch, installed brush guard, replaced heater/blower Assy and installed NOS seat bases in the rear cuz this was a shelter truck and had none.
all in all....she's Turing out nice, and the 4L80E is such a sweet upgrade....I cruise at 65mph at about 2k rpm
 

orgnal

Member
285
4
18
Location
Denver, CO
Installed new front winch springs on my M1097A2, also swapped over to 4 new BFG's on 24 bolt rims, changed fluids in geared hubs and diffs, replaced PS pump, replaced stuck open thermostat, added Milemarker winch, installed brush guard, replaced heater/blower Assy and installed NOS seat bases in the rear cuz this was a shelter truck and had none.
all in all....she's Turing out nice, and the 4L80E is such a sweet upgrade....I cruise at 65mph at about 2k rpm
At some point I would like to get the 4 speed transmission. How much did that set you back by? I am assuming you did it yourself. How much should I be looking to set aside if I was to engage someone to do it for me? Thanks.
 

Retiredwarhorses

Well-known member
Steel Soldiers Supporter
4,261
3,874
113
Location
Brentwood, Calif
At some point I would like to get the 4 speed transmission. How much did that set you back by? I am assuming you did it yourself. How much should I be looking to set aside if I was to engage someone to do it for me? Thanks.
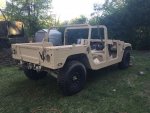
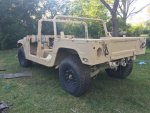
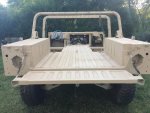
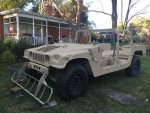
this truck already had it installed...from the factory, it's not a conversion.
but I do 4L80, 242 conversions all the time....but I only do factory/OEM equipment.
so, with that in mind, expect it to set you back 15-20k if done by a shop.
now, some people are going wow, or even BS! Well, half that can be labor, I figured in 120-160 at 65.00hr
right now there are a lot of 6.5,4L80E, 242 packages for sale for around 4-5k, that's an awesome deal that would have cost easily 15k before...or more. Being those packages a fully dressed, a lot of the cost is gone...so it's just body harness as the next biggest part expense, that about 1200-1600.00, the remainder of the parts can be had for an additional 1500.00 or so...it just really depends on your cost basis for parts. Labor is the only variable, you just don't know what issues might arise, but going OEM makes it plug and play.
 
171
5
18
Location
Chaska, MN
I started going through my 1993 2 door M998 I picked up last Monday.

First I pulled the 8 bolt 26 inch bias plys off and put some 24 bolt 37 inchers from Feltz Tire on because my girl likes her pretty shoes:
24 Bolt.jpg

The light switch was missing, and apparently it had one of the push button switches in previously as the standoff tabs had all been removed.

I made 4 one inch tube standoffs out of some brake line to slip over the bolts for the light switch.

The solargizer had the wires from the solar panel cut so I had to install a bridge. I get some 2V+ out of the panel while in the shop and shining a light on it. Measuring the output from the unit to battery I'm only seeing .08V. But that may be because of the sampling period of the multimeter... In retrospect I should have measured the amperage coming from it as any amperage would indicate it's working.

Now to troubleshoot the fuel sensor and possibly the gauge.
Also the alternator is not operating. Time to research rebuilding that myself vs sending it to a pro.
 

WAGNUM

Member
78
4
8
Location
Tigard, Oregon
IMG_0592.jpgIMG_0586.jpgIMG_0587-1.jpg
1. Installed a cargo canvas, had to fab up the frame but I think it turned out ok. 1" EMT Conduit worked well.
2. Cleaned my turn signal contact points (left turns were intermittent)
3. Got a little carried away with the tire dressing...Haha.
 

Predator42

New member
142
5
0
Location
Pleasant Grove Utah
Finished painting mine. I also replaced all the glass in the X doors with 3/8" tempered. Glass cost me $140 for all 4 total and took me about 30 minutes to change them out. Paint was $80 total

IMG_4884.jpgIMG_4888.jpgIMG_4893.jpgIMG_4889.jpgIMG_4882.jpgIMG_4876.jpg
 
171
5
18
Location
Chaska, MN
I love the paint job. But looking between the front and rear doors, I'm not seeing the plate that is part of the 3 point seat belt MWO like this one:
MWO.jpg

I see that plate on two of the three M998's I have access to.
IIRC it is part of that seat belt kit from sportsmansguide.
 

Retiredwarhorses

Well-known member
Steel Soldiers Supporter
4,261
3,874
113
Location
Brentwood, Calif
I love the paint job. But looking between the front and rear doors, I'm not seeing the plate that is part of the 3 point seat belt MWO like this one:
View attachment 616461

I see that plate on two of the three M998's I have access to.
IIRC it is part of that seat belt kit from sportsmansguide.

its hit or miss whether that plate was installed as part of the MWO or not....not sure why, maybe cuz it's a PITA.
im sure it actually does something to reinforce the area, the thing is, it's not installed in the brand new body's.
so it might have been deemed worthless. The additional plate on the back of the B-pillar "sail" is still added from the factory today as it was during the MWO.
 

DanM7890

Active member
1,134
11
38
Location
Houston, TX
Anyone know where to get the thin rubber/foam seal on the bottom of the windshield. I am redoing the whole assembly and this gasket strip used to seal it when upright was very brittle and came off. I also need the c-channel piece to connect the new cover to the windshield that goes on the top and screws in. #8 in the picture.

View attachment TM 9-2320-280-24P-1.pdf
 
Last edited:
171
5
18
Location
Chaska, MN
20160419_185320.jpg

Was doing my PMC yesterday morning and noticed the TP was not at 50 as documented on the fender. Actually I'm running at 35 for all of them. Turns out the core of the valve was loose and that tire had lost it's valve cap. WHEW, that could have been a lot more expensive!!!

So while outside I decided to take some acetone and see what was hiding.
Here is a before pic and then a few after, and one pic where the paint used was thick and stubborn:
20160420_182015.jpg20160420_182159.jpg
20160420_184550.jpg
20160420_184534.jpg
20160420_184538.jpg

Both front fenders and the tailgate have this different paint on them that will take some more vigorous effort to clean off.
20160420_182330.jpg

Can anyone chime in with an explanation on what the markings are?
 
Top
AdBlock Detected

We get it, advertisements are annoying!

Sure, ad-blocking software does a great job at blocking ads, but it also blocks useful features of our website like our supporting vendors. Their ads help keep Steel Soldiers going. Please consider disabling your ad blockers for the site. Thanks!

I've Disabled AdBlock
No Thanks