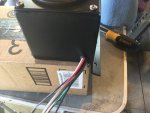
Meanwhile, installed a transfer case LOCK light. Used 16 gauge prestolite wire and packard fittings to match everything and tapped into a 24V block I wired inside the battery box for fans and accessory power. Less likely to forget and leave the thing in high or low lock again, but I've gotten pretty good at checking first before driving.
Norm could I trouble you for some pics of your install? Sounds like a good idea. Thanks DanJ
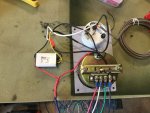
Sure thing:

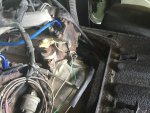
This was both easier AND harder than I thought it would be. I replaced my 218 TC with an NP242 and thought the TC Lock light was a good idea. Lamps are relatively cheap - I think it was around $15 - I bought spools of the prestolite wire and connectors through Eriks Military surplus. So I ran some 16g wire with a female connector plugged into the light above the TC, transmission, using speedo cable for routing, but with everything mounted (wiring, shifter box, muffler, dual oil filters) it was a tight squeeze getting it up inside. I'd drilled a 7/8" hole about 3/4" forward of theforward edge of the shifter plate, enlarged it with a file or two, flipped it over to mark holes for screws, then, using a bicycle brake cable (with a metal ball at one end) through one side of the lamp, I fished the cable through one side hole, put in an 8-32 screw (could've used 10-24 which I also had, but 8-32 has enough "bite" I don't think it's going anywhere), then put in the other.
Now that I knew how long the wire needed to be to reach the TC case switch at the rear, I cut the wire, used another connector, and ran HOT to the bus bar (whole thing is fused at 10A, I have the fans and fog/spot light bar wired to it).
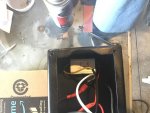
Ground went to a stud I located on the frame confirming ground continuity with a jumper to HOT, touching the YUGE ring connector to several spots while I watched the lamp light.
Works great. (I took picture with battery negative lead switch off).
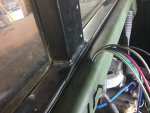
Oh, one other thing. There's a "ledge" just forward of the shifter underneath, part of the support frame, I think. I tried missing it without running into the test plug (big round thing), almost missed it. Had to take a dremel tool to the lamp to trim away just enough plastic so it would fit flush up against the tunnel. Might get around to touching it up with some 383 or something later. I'm afraid if I start painting, I won't know where to stop.