blutow
Well-known member
- 357
- 501
- 63
- Location
- Austin, TX
macmotorsWhere did you get the new lenses? I need to replace all of mine due to cracking/fading.
Steel Soldiers now has a few new forums, read more about it at: New Munitions Forums!

macmotorsWhere did you get the new lenses? I need to replace all of mine due to cracking/fading.
The side marker lenses were like $6-7 each and the front and rear light lenses were around $21 each I believe. I didn't do much shopping/comparison, just added them to an order I was already placing.not sure what mac charges but it is a common civy trucking lens and truck pro or napa might be cheaper. This lens has been used for 20+ years.... Same as all mv's for many years and models also just not hmmwv.

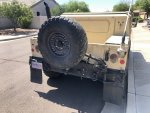
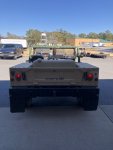
I actually thought about pulling them off the corners and tryIng to mount one in the middle of the tire carrier. Probably a terrible idea but it’s a little disorienting looking at the split screen display on the backup camera screen.Nice back up camera placement

I know , I have the same system except one hanging from my passenger mirror for turning blind spot. I just switch between views so I do not get confusedI actually thought about pulling them off the corners and tryIng to mount one in the middle of the tire carrier. Probably a terrible idea but it’s a little disorienting looking at the split screen display on the backup camera screen.
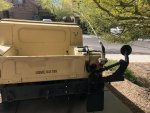
I suppose I could mount the other camera on the front and take advantage of its IR capabilities by skulking around my neighborhood with the lights off at night.

Looks good.During a break from heavier work I decided to clean, prime, and paint turbo exhaust cover to match valve covers.
Hidden by the doghouse nobody else will see it, but I know it’s done and feel better about it.


Amazon and the light is a marine light for underwater use.Where did you get them?
Mark


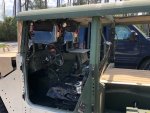
You sound like a drunk college fraternity member.OMG plug those holes!

