• Steel Soldiers now has a few new forums, read more about it at: New Munitions Forums!

  • Microsoft MSN, Live, Hotmail, Outlook email users may not be receiving emails. We are working to resolve this issue. Please add support@steelsoldiers.com to your trusted contacts.


1984 CUCV M1009 build thread

Brett09

New member
135
1
0
Location
San Bernardino, CA
Nice build, keep the pics coming. I live about a mile from where you took the pictures at the Burger King/AM PM. If you need an extra set of hands or an official beer drinker (every project needs one) let me know.

:beer:
 

TCUCV

New member
213
0
0
Location
Chocowinity, NC
This is nice to follow, you are doing some great work...can't wait to tear into mine like this next weekend. More pictures please :beer:
 

Mohawk Dave

Member
226
14
18
Location
CA
Big Thanks to Brett09!!!

He came over today and helped out on the build-doing electrical maintence and troubleshooting.

Thanks Brett!!! You're always welcome.
 

Mohawk Dave

Member
226
14
18
Location
CA
1984 m1009 build updated

Hey Guys,

Here it is so far. Still have to do electronics and vinyl kit on the interior. Buy the M1028 for axles, and add a/c and turbo. Any questions just ask. Enjoy.

P.S. The interior paint is not as red as it looks with the camera flash. It is the bronze, just real fresh. (Like 20 minutes).

Thanks, Dave
 

Attachments

ssgtcampbell77

Staff Sergeant
227
1
0
Location
St Louis MO
UPDATED 3/9/11 ON PG 3 W/ PHOTOS.
UPDATED 3/5/11 ON PG 2 W/ PHOTOS.

1984 CUCV M1009
Former U.S. Navy Seabee @ Port Hueneme, CA
6.2 diesel
Turbo 400
np-208 (soon to be swapped with np-205)
10B/3.08 (soon to be swapped with D60/14 4.56 w/ Eaton Gov-Lok and LS)
28k miles

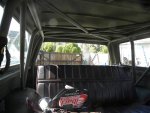
So I found this on Monday, 2/14/11, bought it 2/15/11 and brought it home. We were racing Battle at Primm on 2/19-20/11, so I only had a few days to bring it up to speed.

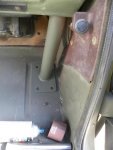
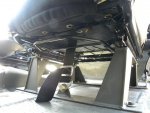
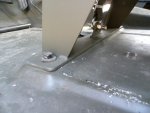
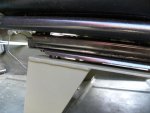
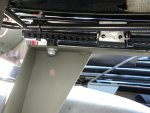
The Government had drained all fluids, oil filter missing, rear diff cover missing, hole punched in tranny pan, fuel tank skid plate had hole torched in it, hole punced in fuel tank, alternator regulators going haywire, but other than that she was beautiful-(to me).

I bought 37 HMMWV tires when i bought the M1009, but since I did not have the D60/14B in yet, i had to get 6 lug wheels.

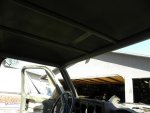
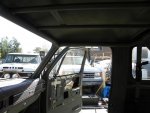
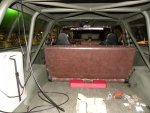
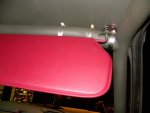
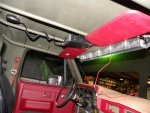
Anyways, got it home Tuesday night and went to work. Here are some photos. Hope you enjoy. Thanks.
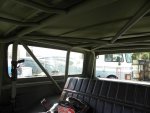
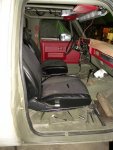
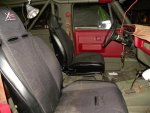
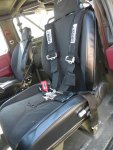
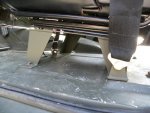
Did the HMMWV Rims bolt up perfect or did you need spacers? I just tried to put HMMWV rims on my M1008 and the rim actually hits the tie rod. I didn't see anything in your thread that mentioned spacers or mods. Thanks.
 

Mohawk Dave

Member
226
14
18
Location
CA
ssgtcampbell77,

I am not running the HMMWV wheels as of now. Due to the fact I do not have the D60/14B 8 lugs from the M1028 yet.

I am running off the shelf Pro COmp wheels that are 6 lug for my 10B axles. They have 4.5" backspacing.

I have read that b/c the HMMWV wheels are only 2" in from the face, you need to have either 1 or 1.5" spacers. But, I am not certain. I know it's somewhere here on SS. Sorry I am not certain.
Check these guys out too. Trail Worthy Fab

-Dave
 

Mohawk Dave

Member
226
14
18
Location
CA
Hey Mohawk, love the seats. Did it take much modification to mount them tp the stock seat mounts??
Thanks in advance
Hi Combatmech,

The seats are the Smittybilt XRCs designed for bolt in to cj/yj jeeps. So I bought them for $210 each, then I bought the Bestop sliders for CJ/YJ for $70 each. (good sliders btw)

We plasma cut all the mount material.

We cut a piece of flat roll, about 2.5 inches wide that spanned left to right and drilled the holes that were used for the original mount. The original bolts were reused into their exisiting fasteners. (Plus an additional 1/2 bolt on pass rear)

We then cut a piece of flat roll, about 1.5 inches wide and bolted it to the slider which was bolted to the seat.

We then placed the seat on wood blocks and I sat in it and adjusted as needed to my liking. We took measurements off the floorboard at front and rear. Front was about 5.5 inches and the rear about 4.75 (iirc).

After we had our dimensions, we cut plates for the 4 sides, tac-welded them in with the seat, then pulled out the whole thing, onbolted the mount from the seat, welded the vertical plates to the upper seat and lower base plates, added gussets, and then added tabs for the 5-point belts to go to.

(Now before anyone says anything, our race trucks seats are to the cage as are the belts, however, the M1009 will be a slow speed vehicle, and therefore I built it this way-You would never see this in our race-desert-trucks, but this is plenty strong for havin a good time.)

Here are some close up pics.

-Dave
 

Attachments

cjtroutt

CW2 26 BDE HHC S6
Steel Soldiers Supporter
756
4
18
Location
C.G. JMTC MICHIGAN
I think they look great better than stock also I love the fab work on the lower brackets to all and all its is out standing job more photos.
 

caladin

New member
115
0
0
Location
So Cal
Blazer is coming together fast. I hope you show the audio setup and the CB setup when you instal it. Imm looking to do a similar install.
 

Mohawk Dave

Member
226
14
18
Location
CA
Blazer is coming together fast. I hope you show the audio setup and the CB setup when you instal it. Imm looking to do a similar install.
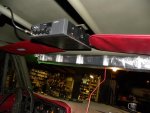
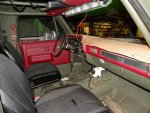
Definitely. I am putting in my Lowrance Globalmap 6000c tonight, and hopefully more of the electronics. I'll take pics.

-Dave
 
Top
AdBlock Detected

We get it, advertisements are annoying!

Sure, ad-blocking software does a great job at blocking ads, but it also blocks useful features of our website like our supporting vendors. Their ads help keep Steel Soldiers going. Please consider disabling your ad blockers for the site. Thanks!

I've Disabled AdBlock
No Thanks