• Steel Soldiers now has a few new forums, read more about it at: New Munitions Forums!

  • Microsoft MSN, Live, Hotmail, Outlook email users may not be receiving emails. We are working to resolve this issue. Please add support@steelsoldiers.com to your trusted contacts.


How have you civilized your MEP Generators?

storeman

Well-known member
1,345
52
48
Location
Mathews County, VA
By golly, those are some modifications alright! I understand your desire to use the free oil but why all the other changes, including removing the sound attenuation enclosure? No offense intended but it seems like you created a lot of work.
Jerry:confused:
 

SurfinElvis

New member
24
1
0
Location
Chincoteague Island VA
There was no ASK kit on this unit. Doors were beat up and, with extremely tight setback limitations, my shed was barely wide enough inside to allow for easy access for door openings with my WVO filtration system on one side.
 

ctfjr

Member
83
2
8
Location
central CT
Good post Triple Jim! I also picked up current xfmrs & meter from that Ebay seller - was a little concerned with him being in Asia but he had good feedback and the items eventually came :)

I purchased the digital meters to go with the transformers and picked up a new electrical enclosure that my company was throwing out. It's about 8X6X4 inches & I am configuring it to go on top of the electrical connection box of my 003 - I have it currently permanently hooked up & piped with pvc, the last couple of feet are plastic flex pipe. I think I like your install idea better tho - it appears to be near your breaker box.
Ok, I've dragged out this project too long already :)

Finished the assembly of the ammeter add-on yesterday, now just need to mount it on top of the electrical distribution box on the generator. My digital 0-100A AC meters require 12 volts so I had to put an old open frame power supply to use. The wires will come in the top, each hot leg will go through one of the current transformers and exit out the bottom (where the nipple is now).

ammeter_1.jpgammeter-2.jpg
 

Triple Jim

Well-known member
1,373
277
83
Location
North Carolina
Looks good so far. I'm sure you have a good reason, but why are you bringing the wires in the top instead of keeping everything going in and out of the bottom so it's hidden?
 

ctfjr

Member
83
2
8
Location
central CT
Looks good so far. I'm sure you have a good reason, but why are you bringing the wires in the top instead of keeping everything going in and out of the bottom so it's hidden?
Its permanently in place with my wiring coming down from the ceiling - here is a pix while I was installing it. The flex conduit goes into 1-1/2" PVC pipe back to my xfer switch in the basement. I need to trim back the flex conduit to install the ammeter box.ground_wire.jpg
 

Attachments

Triple Jim

Well-known member
1,373
277
83
Location
North Carolina
Gotcha, makes sense now. It's on my list to put a strain relief on the side of my distribution box to get rid of the usual four wires dangling out the door.
 

Triple Jim

Well-known member
1,373
277
83
Location
North Carolina
I'm not sure this makes my 003A more civilized, but it will let me understand when the regulator is working hard and when it's not. I found a small 0-2 milliamp meter in my spare meters box and made a shunt for it so it reads 0-2 amps. The wire that normally goes to terminal 17 on the regulator now goes to the meter positive terminal, and a wire from the meter's negative terminal goes to terminal 17. The meter reads the regulator current carried by Q3, the output transistor.

reg_cur_panel.jpg reg_cur_meter.jpg
 

ETN550

New member
457
9
0
Location
Knoxville, TN
Thats a good mod. It will be interesting to note how the field current changes with temperature, load and power factor. Particularly as a unit is loaded cold and allowed to warm up. It will also be interesting to see how long it takes to reach a stable temp or condition with load. When I load bank the 3kw units they need a voltage adjustment for up to an hour after steady rated load was initiated. And there may be 5 to 8% drift upward as the windings and control box heats up. Do these 002 and 003 regulators sense voltage at all three phases or do they only sense at one leg, or one coil?
 

Triple Jim

Well-known member
1,373
277
83
Location
North Carolina
I have the meter wired to read regulator current, which on an 002A or 003A is not the same as the exciter field current. The exciter field current is supplied by CVT1 and the rectifier bridge A4. CVT1 has three sections, so it senses all three phases. It also has a control winding in each section, and is designed so that when regulator current passes through those windings, less current is supplied to the rectifier bridge, and in turn, less is supplied to the exciter field. Regulator current will be high when the regulator wants to reduce the generator output, and low when it wants to increase the output. The regulator gets sense voltage from L3 only.

This regulator operation is reversed from other systems that have the regulator output directly supply the generator field current, and that's why it's not true that idling an 002A or 003A makes the regulator work extra hard.

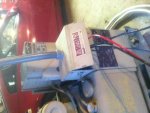
The weather is cold and blustery here today, but tomorrow is supposed to be better. I'll play around with it a little tomorrow and see what I can learn.
 

Triple Jim

Well-known member
1,373
277
83
Location
North Carolina
I had a chance to run my 003A yesterday. I varied the engine speed from lowest to highest, both with and without a 6 kW 240V load. The regulator current didn't vary a lot, but tended to increase with load and with increased engine speed. It was highest with the 6 kW load at maximum engine speed, about 400 mA. Lowest regulator current was at no load and lowest engine speed, and was less than 150 mA on the little meter, as accurately as I could read it.

For ETN550, I probably ran the generator for about 20 minutes and there was no significant variation in output voltage or regulator current as it warmed up. I'll know more about that as I use the generator more though. I wouldn't be surprised if the variation is more obvious from winter to summer, when the regulator's temperature is very different. On the 003A, the control box doesn't really change temperature much as the generator warms up.
 

Triple Jim

Well-known member
1,373
277
83
Location
North Carolina
I bought an MEP-003A last summer, and thought it would be a good idea to have a spare regulator. When I saw the going prices for them, and since I have experience in this area, I decided to build one. I based it on the original 72-5020 board and its nearly identical brother, the 72-5338 board. Since I'm not interested in 400 Hz operation, I left out all the parts specific to that frequency and designed the board so that the jumper connections are built in. By doing this and using a compact double sided circuit board, I was able to make it much smaller. To address the failures of the original 2N3584 output transistors, I chose a modern replacement that's rated for 4 Amps maximum instead of the original's 2A rating, and I mounted the circuit board on an aluminum plate that has the mounting pattern of the original board. The output transistor is attached to the mounting plate, which acts as a large heat sink.

To keep the cost down, I did not use the very expensive tantalum electrolytics, but I did choose good quality capacitors rated for thousands of hours at 105°C or higher, at their rated voltages. Since they don't get asked to work at temperatures or voltages that high, I expect many years of trouble free operation. I've run it for several hours at various loads, including powering my house, and it behaves the same as my original 72-5338 regulator.

regulator_installed.jpg transistor_detail.jpg
 

rbivens

New member
17
0
0
Location
Elizabeth, CO
I bought an MEP-003A last summer, and thought it would be a good idea to have a spare regulator. When I saw the going prices for them, and since I have experience in this area, I decided to build one. I based it on the original 72-5020 board and its nearly identical brother, the 72-5338 board. Since I'm not interested in 400 Hz operation, I left out all the parts specific to that frequency and designed the board so that the jumper connections are built in. By doing this and using a compact double sided circuit board, I was able to make it much smaller. To address the failures of the original 2N3584 output transistors, I chose a modern replacement that's rated for 4 Amps maximum instead of the original's 2A rating, and I mounted the circuit board on an aluminum plate that has the mounting pattern of the original board. The output transistor is attached to the mounting plate, which acts as a large heat sink.

To keep the cost down, I did not use the very expensive tantalum electrolytics, but I did choose good quality capacitors rated for thousands of hours at 105°C or higher, at their rated voltages. Since they don't get asked to work at temperatures or voltages that high, I expect many years of trouble free operation. I've run it for several hours at various loads, including powering my house, and it behaves the same as my original 72-5338 regulator.

View attachment 415324 View attachment 415325
This is awesome! I was wondering if anyone would ever get around to doing this.
I was planning on a spare, too. If the price is right (may I ask what you plan to sell them for?), count me in...

Ray
 

Jimc

Member
725
1
18
Location
Mullica, nj
you know what i find really interesting is that the circuit board is printed and labeled and everything. i have done a small amt of electronic work myself, not enough to be able to redesign the vr board but enough to know that doesnt look like any homemade or one off board i ever saw. did you have a small run of boards made jim or did you actually make and label it yourself?
 

Triple Jim

Well-known member
1,373
277
83
Location
North Carolina
Ha Jim, I wondered if someone would ask that. I work with a circuit board prototyper who takes the Gerber files and makes boards at a reasonable price. The default board is double sided, and can be silkscreened on both sides for the basic price. So I figured I'd draw a silkscreen layer that had parts designations and values to match one of the original boards, in this case 72-5338. This makes it easy to assemble the board, and easy to troubleshoot later if needed, since I made parts like "R1" and "C3" match the schematic in the TM. The minimum run for prototype boards from this company is three boards, so I'm not out a lot of money. I use KiCad on Linux to generate the Gerber files.

Your ability to come up with graphics to restore these generators is equally amazing to me, by the way.
 
Top
AdBlock Detected

We get it, advertisements are annoying!

Sure, ad-blocking software does a great job at blocking ads, but it also blocks useful features of our website like our supporting vendors. Their ads help keep Steel Soldiers going. Please consider disabling your ad blockers for the site. Thanks!

I've Disabled AdBlock
No Thanks