• Steel Soldiers now has a few new forums, read more about it at: New Munitions Forums!

  • Microsoft MSN, Live, Hotmail, Outlook email users may not be receiving emails. We are working to resolve this issue. Please add support@steelsoldiers.com to your trusted contacts.


What did you do to your deuce this week?

RobM36A2

Member
302
9
18
Location
The Netherlands
I went to an oldtimer event with the M36 and some buddy's. They drove a GMC K-1500 (Scrambler from here), M809 cargo and a 1943 GMC CCKW (dumptruck).
2 of us slept overnight in the 1943 GMC. Had some fun, tried to sell any stuff, but failed. And burnt my skin from the sun, not a pleasant feeling...
Made some pics, but not had the time to put the pics on the pc.
 
After countless times opening up my door to get something outta the cab and having the wind slam the door window into the mirrors, I finally corrected that problem. Using a hole punch (cheap one for paper) I punched several holes in the middle of the diamond pattern in a remnant of the material I used for my floor mats a few posts ago, then cut squares around the holes and snipped the corners down to form a rough octagon. Then after removing the cotter pin that holds the door stop to the door, slide the stop back into the door frame, open the kick vent and remove the door stop by reaching into the top rear of the kick vent. There should be a rubber bumper on the stop, so I slid off the original bumper, added 3 of my little rubber mat shims, then replaced the original rubber piece followed by another rubber mat shim. After reinstalling the stop and the kotter pin to hold it to the door, Viola'! No more knocking my mirrors out of adjustment every time I open the door! If anyone needs pics of the procedure, I can take some and post them.
:driver:
 

mmeridith

Member
117
1
16
Location
Apopka, FL
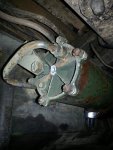
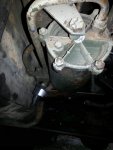
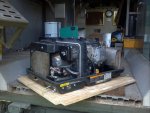
Replaced the Air Pack (old/long style) the rear stud mount was broke, reconnected the service & aux gladhands to their lines (lines were cut & crimped), new rubbers for the gladhands, fresh DOT5 in the brake lines. airpack1.jpg airpack2.jpg
 
Last edited:

Kloakndagr

New member
266
4
0
Location
On The Road/California
Busy this week, getting ready to paint.

1. Painted wheels flat black
2. Drained and filled all three differentials.
3. Drained transmission and transfer case, will fill tomorrow.
4. Treated seat frames with chassis saver.
5. Treated tool box with chassis saver.
6. Treated battery hold down frame and supporting parts with chassis saver.
7. Treated frame and under van shelter box with chassis saver.
 

svd dragunov

New member
152
0
0
Location
grants new mexico
had a leaking rear hub. pulled it, fixed everything. no more leak. now i need to trace down the small air leak in the cab. found one fixed it, but theres is apparantly another some where. will find it today.
 

Capriceii

Active member
117
39
28
Location
Streetsboro, Ohio
This weekend my deuce " Maggie" move in to a repair bay to receive her new heart.

She bit snapped and sack any one that got close enough. She provided hours of swearing and laughs among friends, and created memories.

Love that big green and rust colored hunk of steel!

TF
 

gungearz

New member
1,719
4
0
Location
northwestern indiana
Just got back from a nice long drive by lake Michigan and taking the wife out for breakfast for mothers day in the deuce !!!!

Fella's, wish the wife, girlfriend, mother, or yourself a Happy Mothers Day for me !!! Cause without them.... We most likely wouldn't have the green iron we own today...
 

svd dragunov

New member
152
0
0
Location
grants new mexico
Just got back from a nice long drive by lake Michigan and taking the wife out for breakfast for mothers day in the deuce !!!!

Fella's, wish the wife, girlfriend, mother, or yourself a Happy Mothers Day for me !!! Cause without them.... We most likely wouldn't have the green iron we own today...
hmmm without the wife, id probably have more.........................
 

brianp454

Member
572
11
18
Location
Portland, OR
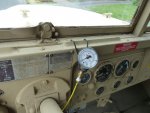
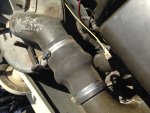
Today I installed a “PO man’s boost gage.” I used some spare brass fittings, 1/8 tubing and a 0-30 psi bourdon tube gage. I would prefer a 0-10 or 0-15, but didn’t have one of those handy. I installed the end in the 1/8 NPT threaded hole in the intake elbow. I think this is a good spot for it and a temp gage as I would expect the velocity head to become pressure head after the elbow flares out in this spot. I used #10 copper wire twisted around to hold it on the dash. I’m only seeing 3.5 psi max when 2100 RPM+ and full IP. I see no boost when doing most driving and just about 1 psi peak when doing regular non-aggressive driving. The IP has not been tweaked. Is this similar to what you guys see?P1030052.jpgIMG_0455.jpg
 

hunderliggur

New member
237
0
0
Location
Lothian, MD
Made her earn her keep by pulling out a 8" Maple tree and pulling a cut 12" Poplar tree that was tangled in the canopy. Now I can get the deuce down the forest trail to the back of my house. (BTW-that's diameter, not height!). Still waiting on the collectors insurance so I can get her on the road in the People's Republic of Maryland.
 

docpadds

Member
Steel Soldiers Supporter
107
2
18
Location
Ashville, OH
2013-05-12 21.26.15.jpg

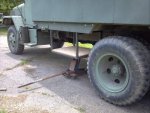
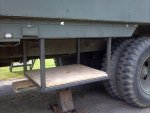
Genny shelf done. Next a custom fuel tank where tire carrier is and route wiring.

Next week we make custom boxes to cover it for a more factory look.
 
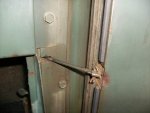
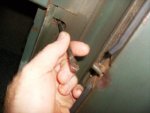
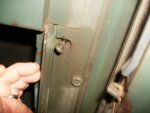
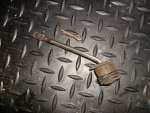
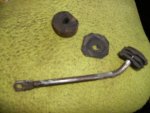
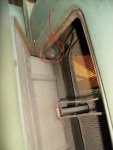
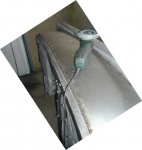
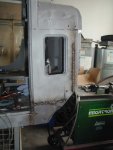
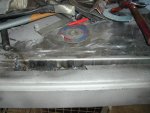
Please post pics of your door fix!
Door Fix Detail Reply TAKE TWO.

Step 1. Remove the cotter pin that holds the limiter rod through the door and slide the limiter rod back in to the door jamb leaving about 1 inch outside the jamb.
Step 2. Open the kick vent and reach into the top of the vent opening from the outside of the cab to remove the limiter rod.
Step 3. Cut some rubber mat, tire sidewall, or similar material into 1 inch squares or circles and punch a hole in the center of each piece.
Step 4. Remove the original rubber buffer from the limiter rod and slip however many shims on the rod you may need minus one for the contact side of the buffer, (between the door jamb and original buffer)
Step 5. Replace the limiter rod in the opening in the door jamb through the kick vent, and replace the kotter pin that secures the limiter to the door, slightly spread open the kotter pin to keep it in the door clevis and guess what, you're done!

The entire fix on both doors took me all of 15 minutes (if it took that long). Now enjoy the ability to open your doors without knocking your mirrors out of adjustment. The pictures show the basic views. I hope this helps!
:driver:
 

Attachments

docpadds

Member
Steel Soldiers Supporter
107
2
18
Location
Ashville, OH
O
Only a small job today. Cut wheels off cabinet and mounted it permanently.
Our armorer is shorter and needed the extra 5" lowering. We have an event saturday so have to be all done.

2013-05-13 20.27.44.jpg
 
Top
AdBlock Detected

We get it, advertisements are annoying!

Sure, ad-blocking software does a great job at blocking ads, but it also blocks useful features of our website like our supporting vendors. Their ads help keep Steel Soldiers going. Please consider disabling your ad blockers for the site. Thanks!

I've Disabled AdBlock
No Thanks