hummer4x4guy
Member
- 771
- 4
- 18
- Location
- Lansing, Mi

Got my convoy ahead/follows reversible sign.
Sent from my iPhone using Tapatalk
Steel Soldiers now has a few new forums, read more about it at: New Munitions Forums!

That towing bar of yours is sure sweet.Got my convoy ahead/follows reversible sign.
Sent from my iPhone using Tapatalk
The signs can come with magnets but mine has 3 holes along the top and bottom for bungee cords.That towing bar of yours is sure sweet.
Is the sign magnetic, or how do you mount it?
And that is a great item, too, by the way.![[thumbzup]](https://www.steelsoldiers.com/images/smilies/icon_smile_thumzup.gif "Thumbs Up [thumbzup]")
Thunder Squirrel, can you walk us through how you applied the db Skin? I keep looking at it or going with Lizard Skin.
I went with dbskin because I was able to get 5 Gallons of it for the best price possible. As well as some dbshield sheets. It took ~3gal to do 4 coats on the entire interior of the truck, up to about the middle of the b-pillar.T.S.-- I'm liking the looks of this stuff. Sound deadener and heat resistant covering, that's a win-win situation. Did you buy 1 or 5 gallons? Is the color of it grey. That really looks nice--thanks for sharing that. Looks like I wont use the herculiner in mine after all.


This is a regular problem, sure wish we could figure out away to take operator error out of the equation.....Please correct your tapatalk settings to upload the attachment instead of remote linking. Otherwise the site will just show links.
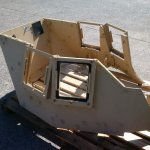
Sweeeeeeeeetttttttt!!!!!!!!Got my new MCTAGS cupola today, just need to figure out how to mount it

Yeah, I also like the light bar on the windshield frame. Looks good!It looks fine to me; real good as a matter-of-fact.


That's a great item!Picked up an "unkown" vehicle part from GL to fabricate a front barrier, so I can push stuff around on the ranch. With a couple of mods I should be able to use the brush guard brackets and switch out as needed.
View attachment 645634 View attachment 645635