• Steel Soldiers now has a few new forums, read more about it at: New Munitions Forums!

  • Microsoft MSN, Live, Hotmail, Outlook email users may not be receiving emails. We are working to resolve this issue. Please add support@steelsoldiers.com to your trusted contacts.


WSUCougar's M925A1 Acquisition and Build Thread

wsucougarx

Well-known member
6,951
65
48
Location
Washington State
LWS Pics for reference Part II (MTVR)

MTVR LWH Pics
 

Attachments

wsucougarx

Well-known member
6,951
65
48
Location
Washington State
LWS Pics for reference Part III (HMWWV/MISC)

More pics of the HMMWV and misc.
 

Attachments

wsucougarx

Well-known member
6,951
65
48
Location
Washington State
LWS Additions (Armor Plate, MK64)

I had a little time yesterday before my son's Little League game and today to add some parts to the LWS. Yesterday, I managed to muscle that 100+ lb armor plate to the LWS. That was something else to get up there. I got her up onto the fender and then did a balance trick standing on the hood trying to get the plate into place. I almost dropped her a couple times but managed to get the mounting bolts in without incident. I picked up the HMMWV chicken plate and the UPA off Craigslist last November or so for about $60 total;-).
Today I got the MK-64 into place along with the 40mm ammo tray.
My biggest concern going into this project was height clearance. At the top of the armor plate she's at 12'...no problem. I also had to add some washers to the lower bolt mounts so she could clear the front LWS crossbar. I tried to locate a riser but all the risers I found fit the HMMWV weapon tray and not the M939 series weapon tray.
Pics:
1- Universal Pintle Adapter (UPA) for mounts with armor plates
2- UPA with armor plate (HMMWV plate)
3- MK64 MOD 7 Mount
4- Pic showing the overhang over the cab (passenger side)
5- MK64 MOD 7 close up
6,7- Had to space the Plate upward to clear the front crossbar
8- Backside of the mount
9- Pic showing the overhang over the cab (driver side)
 

Attachments

Last edited:

wsucougarx

Well-known member
6,951
65
48
Location
Washington State
LWS Additions (Armor Plate, MK64) Part II

More pics of the 40 mike mike ammo tray added to the MK64. I haven't located a replica weapon for this setup yet. Naturally an M2HB comes to mind but may end up putting an M240B Airsoft up there. I still need to locate an M240B/M249 MK64 adapter if I do. I may just fabricate something to make it work. If no mount is made then some good ole zip zies will work for parades.
As previously stated, I've got two smoke dischargers I need to mount. But need to fab up some angled mounts to mount on the LWS support legs. Also, I have a dual .50 ammo can tray I need to mount as well. So many projects but so little time. With baseball going on, my motivation for this project is hitting an all time low. So I may not keep this thread updated.
 

Attachments

Last edited:

wsucougarx

Well-known member
6,951
65
48
Location
Washington State
Mudflap Fuel/Water Can Mounts

Today I took care of a couple odd and ends projects. I finally got around to mounting my fuel/water can mounts on the rear mudflaps. This is something I have done to all my trucks, so it was time. There was nothing special about this project. The lower two mounting holes on the mounts line up perfectly with the mudflap bolts (two holes you don't have to drill). Once you get the lower two bolts tightened up, then you just use the upper holes on the mounts to guide the drill bit and you're done. I did mount a footman loop near the top of the Fuel/Water can to stabilize the can while offroad. I plan on adding a side to side strap as well.

Pics:
1- I added Grade 8 washers to the three mounting bolts. Not sure why AM General never put washers on these bolts
2- These two holes were used to mount the lower two Can Mounts
3- Can Mount installed as well as the footman loop
4,5- Good to go
 

Attachments

Last edited:

wsucougarx

Well-known member
6,951
65
48
Location
Washington State
Lollipop Front Turn Signal Project

Today I also took care of the "Lollipop" lights. This project was more or less for safety. As all you know, the M939 series truck has a huge blind spot. I felt it was necessary to add these lights to warn cars in my blindspot more than anything else. The front end of the truck is staring to look a bit cluttered with all the lights. I think I'm going to make up some light covers for the Route Clearance Lights.
I had the brackets in my spare parts bin as well as the lollipops. I had the "Y" connectors left over from an electrical project. I borrowed the male to male connector off a couple old headlight assy I took off my M109A3.
For this project you will need the following:
2- Lollipop Lights
2- Lollipop brackets
2- "Y" connectors
4- Male to Male Connectors. Tapping into wire #460 (right side) and #461 (left side)
12- Star Washers
4- 3/8" Course thread bolts

When connecting the Lollipop mount, be sure to use star washers!! You've got to ground the bracket for the light to work. Be sure to test out the light operation before putting the wire protective panel back into the wheel well. I used a total of 6 star washers per side to ensure ground wasn't an issue.

Pics:
1- Main components
2,3- Proper grounding with star washers.
4,5- Using the headlight male to male connectors with the Y-connectors
6- Finished product
 

Attachments

Last edited:

Amer-team

Well-known member
1,706
28
48
Location
Centralia/WA
Neat stuff Mike. We could have used you at Matlock today. We had 3 WW2 jeeps, 1- 1 1/2 ton Chev, WW2, a Chenowith Fast Attack, and a couple of other vehicles showed up, one being an unrestored M38A1 towing an unrestored M416. See you at AFD.
 

wsucougarx

Well-known member
6,951
65
48
Location
Washington State
Ive seen references to the TOW missle but not sure exactly what for.
Now that I've got the LWS mounted and ready to go. I am now looking for an M2 or an M3 .50 cal replica of some sort. Definitely no resins for me. I'm after an all metal authentic looking replica. More about that later.
Found this M939 series Guntruck video on youtube sporting an LWS.
http://www.youtube.com/watch?v=IM7MXrO-Ylk
 
Last edited:

wsucougarx

Well-known member
6,951
65
48
Location
Washington State
MTVR Tailgate Ladder Project

Not sure if it's my age or my truck is getting taller, but it is getting more and more challenging getting into the bed of the truck. I had a USMC MTVR 7 ton truck tailgate ladder I bought off ebay for $40 last year. Today, I decided to get her installed to ease my accessibility into the bed of the truck. The install was pretty straight forward. The only time consuming portion was using the cutting tool to cut the mounting slits into the tailgate. I have plans of possibly adding some handholds for my kids but need to figure out how and where to put them. The ladder is not a permanent fixture on the tailgate. I use two quick release pins to keep her secured and adds to the ease of dismounting the ladder if I need to. I mounted the ladder off to the side so you can use the sideboard stabilizer bar as a handhold plus it's where the MTVR has theirs;-)

Pics:
1- Parts for this project: MTVR Ladder, two "L" shaped brackets, two pins, couple pieces of metal stock
2- MTVR Ladder nomenclature
3- Intial mounting slits
4- Once intial mounting slits are in, place the ladder in place to mark the upper studs
5- Mounting slits made
6- Final measurement to make sure the ladder is squared
7,8- Ladder mounted
9- Metal stock used to reinforce the tailgate sheet metal.
10- Much closer to the ground than the tailgate footholds. Too bad it's not telescoping for when I advance in age;-)
 

Attachments

Last edited:

jonesal

Mission Specialist
Steel Soldiers Supporter
413
68
28
Location
Brookings, SD
I can't tell from your pics. Is the ladder reversible? Meaning, does it mount in the tailgate up position as well, but on the outside of the tailgate? Or only in the down position? I have the same ladder and have paralysis by analysis on how to mount it...

Thanks,
Al Jones
M923
 

wsucougarx

Well-known member
6,951
65
48
Location
Washington State
Hi Al, the way the ladder is configured I would not be able to mount it on the outside of the tailgate. The ribbings on the tailgate would impedes it's mounting. However, if you installed some spacers then you could mount that way. Right now, I use the towbar storage L brackets as a step to get up onto the bumperettes when the tailgate is up.
 

dragonman

Member
174
1
18
Location
Mason city, Iowa
Next order of business was tackling the passenger side cab bracket. This install was pretty straightforward. The bolts for the cab bracket are already installed. You just need to remove them, install your bracket, and replace/tighten the bolts and you're done.
One thing you need to pay attention to is to tuck your cab bracket under the corner of the dash plate. You may need to use a prybar to open the space up so you can slide the bracket into place. It can be a little tricky lining up the two halves of the cab bracket to the hole. Just use a screw driver to recenter everything, then install your bolt loosely. Get all your bolts into place and make sure your bracket is squared up before getting too crazy on tightening everything down;-).
Also loosely install the three big bolts on the outside of the mount.

Pics:
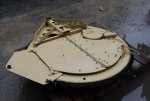
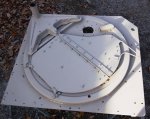
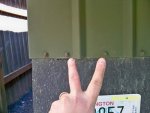
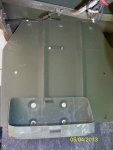
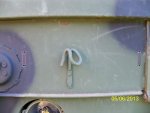
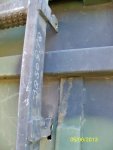
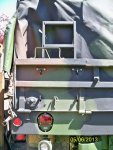
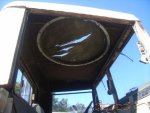
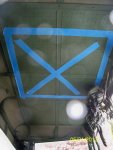
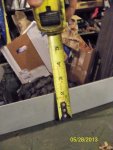
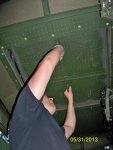
1-Predrilled holes for the missing "L" shaped support bracket
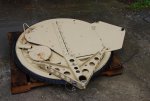
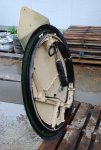
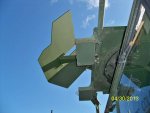
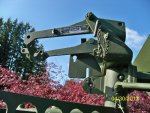
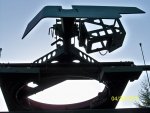
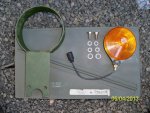
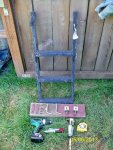
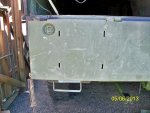
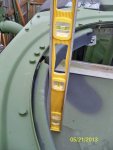
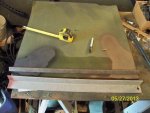
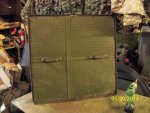
2-Two halves of the passenger side cab bracket. Notice the 5 holes in the middle. Those holes mount to the "L" shaped bracket. This is the only difference between the M35A2/M809 series truck's brackets.
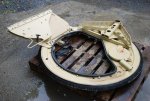
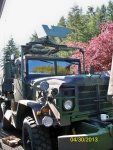
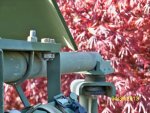
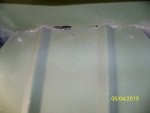
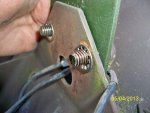
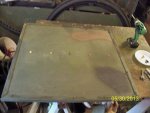
3-The factory installed bracket bolts removed
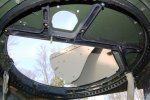
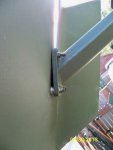
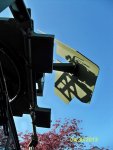
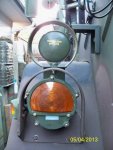
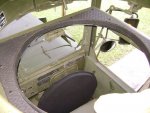
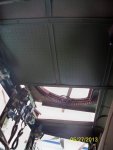
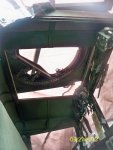
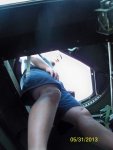
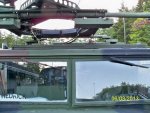
4-The small space where the bracket needs to be tucked under the dash plate.
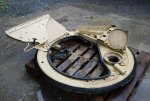
5-A little prying helped open up the void
6-Install each half separately. Just tap into place with a rubber mallet
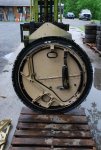
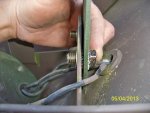
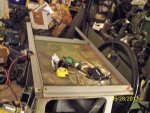
7-Centering the hole with a tool that was nearby
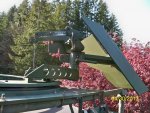
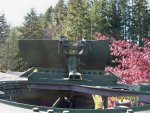
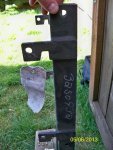
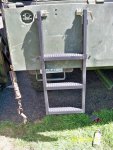
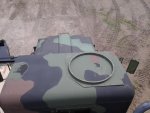
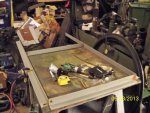
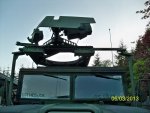
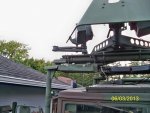
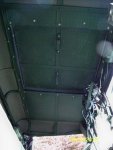
8-Bracket installed and ready to go
Are there nutserts in the predrilled holes my M923A2 doesnt have holes in the cab.
 

wsucougarx

Well-known member
6,951
65
48
Location
Washington State
Roof Cutout Brainstorming

With Little League in full swing and helping coach my son, this project is once again on hold. I do need to engineer something for the roof cutout on this truck. I need to make something with a plate with a cutout and a lip on the external side. I picked up a vinyl dome shaped cover found on the FMTV's to keep the rain out of the cab. I've looked all over the internet and on SS. Thus far here are some pics I am using for my project. The first 3 pics are the HEMTT cutout plate. Ultimately, this is the part I am after. Just need to find one in short order.
 

Attachments

Last edited:

wsucougarx

Well-known member
6,951
65
48
Location
Washington State
LWS Hardtop Hatch Part I

I finally did it! The one project I was really apprehensive about is almost completed. There's just something inherently wrong about cutting into a perfectly good hardtop. Especially one that you've spent a ton of time to straighten out and repaint. I must have sat in my cab for at least 10 minutes staring at the tape template I laid down for my initial drilling. Then all at once I made the first starter drill for my jigsaw. Once the first hole was drilled, it was easy after that. Pretty similiar to when you first get that new car and you're worried about that first scratch:-D.
Initially, I was trying to locate a HEMTT roof cutout plate. However, my search turned up all but one kit for $600 shipped. I couldn't justify that kind of money for a plate so I just did what I normally do. I made my own. Having seen the MK48 square hatch kits here and there, I thought I'd do the square hatch idea using the hardtop's own sheet metal as the hatch itself. It only made sense to keep things uniform. The only thing I had to do was build the hatch rim and hatch rails. The only money spent was on the 1.5" 1/2" grade 8 bolts/nuts. That's it.
Rather than go into too much detail, I'll just let the pics do the talking.
Pics:
1- Using a level to figure out the working diameter of the LWS in full rotation
2- Finding the midpoint and pencilling in the rough template
3- Rough Template on the interior to make sure it doesn't interfere with anything vital in the truck
4- Uh oh, no turning back now...naturally it started to pour once the hole was made.
5- Starboard angle
6- Trying to figure out the hatch rails
7,8,9- The nice angle iron I used as the riser for the LWS hatch
10- Angle bracket
 

Attachments

Last edited:

wsucougarx

Well-known member
6,951
65
48
Location
Washington State
LWS Hardtop Hatch Part II

I still need to put the latches on to lock the hatch into the closed position. I also need to repaint everything back to 383 Green.
Also, I am going to fabricate somekind of gunner's platform for the bench seat. I like to keep the seat back upright to accomodate another passenger (my daughter) and have my son in the LWS for parades. I still yet have to secure a replica crew served weapon. I am going to add a secondary weapon mount just right of the weapon tray for an M249 replica. So many ideas but so little time and money to do it.


pics:
1- Hatch is complete
2- Hatch dismount/mount handholds. The hatch is stored topside on the roof right above the driver.
3- Wife taking a pic, just take it and get it over with
4- Checking the clearance...good to go
5- Yep
6- Closing the hatch
 

Attachments

Last edited:

jonesal

Mission Specialist
Steel Soldiers Supporter
413
68
28
Location
Brookings, SD
Awesome work. I was also eye-balling the treasure pile behind the pics where you are attacing the hatch rails... :-D
 

wsucougarx

Well-known member
6,951
65
48
Location
Washington State
LWS Aux. M240/M249 Swivel Weapon Mount

Today I added my aux. LWS weapon mount. I have seen pics of LWS type turrets on HMMWV with aux. back up weapon mounts. I figured since I have two M249/M240 swivel mounts in the garage, I might as well use one of them on this project. The great thing about these swivel mounts is they have built in ammo trays for both the 5.56 and 7.62. This particular mount fits both the M249 and the M240B without modification. The only work I had to do was to fabricate a bracket made from left over "L" bracket from my towbar project. This aux mount is mounted to the turret so it rotates with the main weapon mount.
At this point, the plan is to have an M240B in the main mount with an M249 in the aux mount. If I find a M2HB then it'll be matched up with the M249.
I also added pics of the hatch on the outside so you can see it's profile. I've had a few question about how it looks so these are for you;-)
Pics:
1- Swivel Mount
2- Hatch. Just put some epoxy caulk to seal out the weather. Still need to add paint
3- Just needs a couple weapons
4- Interior with hatch secured
5- Low profile hatch
6-
 

Attachments

Last edited:
Top
AdBlock Detected

We get it, advertisements are annoying!

Sure, ad-blocking software does a great job at blocking ads, but it also blocks useful features of our website like our supporting vendors. Their ads help keep Steel Soldiers going. Please consider disabling your ad blockers for the site. Thanks!

I've Disabled AdBlock
No Thanks